[웹 프로그래밍 기초] Django를 활용한 웹 게시판 만들기
2020. 6. 15. 14:49ㆍ노트/Django : 웹

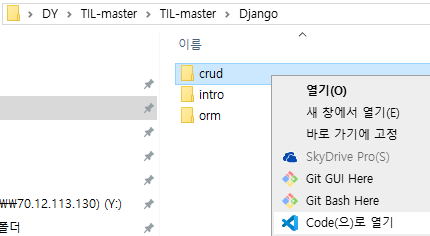
1. CRUD 폴더 생성후 VS Code로 열기
2. new Terminal 생성

3. Python 가상환경 생성
python -m venv venv Python 가상 환경 활성화 (VS Code 기능)
- Ctrl + Shift + p
- 'Python: Select Interpreter'
- 가상 환경 'venv' 선택
4. Django 설치
pip install django==2.2.13
5. Django Project 생성
django-admin startproject crud .
6. Django App 생성
python manage.py startapp articles
7. Django App 등록
- settings.py > INSTALLED_APPS
- 'articles' 추가
8. 언어 및 시간 설정
- settings.py
- LANGUAGE_CODE = 'ko-kr'
- TIME_ZONE = 'Asia/Seoul'
9. base.html 설정
- settings.py
- TEMPLATES - DIRS
- os.path.join(BASE_DIR, 'templates') 추가
- 최상위 폴더에서 templates 폴더 생성
- templates > base.html 생성
* base.html 생성하는 이유 :
navigation bar처럼 웹 페이지 이동해도 움직이지 않는 기본 틀을 만들기 위해서
<!DOCTYPE html>
<html lang="en">
<head>
    <meta charset="UTF-8">
    <meta name="viewport" content="width=device-width, initial-scale=1.0">
    <title>Document</title>
</head>
<body>

    {% block body %}
    {% endblock %}

</body>
</html>
10. urls.py 분리
- articles > urls.py 생성
- crud > urls.py에서 include로 path 추가
11. artiles > templates > articles 폴더 생성후 다음의 html 생성

11-1. create.html
{% extends 'base.html' %}

{% block body %}

<h1>Article Create</h1>

<h2>제목: {{ title }}</h2>

<p>내용: {{ content }}</p>

{% endblock %}
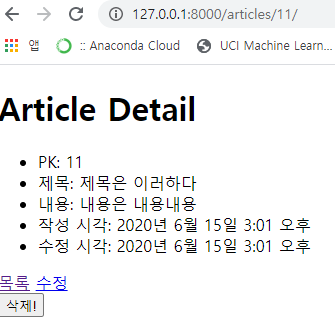
11-2. detail.html
{% extends 'base.html' %}

{% block body %}

<h1>Article Detail</h1>

<ul>
    <li>PK: {{ article.pk }}</li>
    <li>제목: {{ article.title }}</li>
    <li>내용: {{ article.content }}</li>
    <li>작성 시각: {{ article.created_at }}</li>
    <li>수정 시각: {{ article.updated_at }}</li>
</ul>

<a href="{% url 'articles:index' %}">목록</a>

<a href="{% url 'articles:edit' article.pk %}">수정</a>

<form action="{% url 'articles:delete' article.pk %}" method="POST">
    {% csrf_token %}
    <input type="submit" value="삭제!">
</form>


{% endblock %}
11-3. edit.html
{% extends 'base.html'%}

{% block body %}

<h1>Article Edit</h1>

<form action="" method='POST'>
    {% csrf_token %}
    <label for="title">제목</label>
    <input id='title' type="text" name='title' value="{{ article.title }}">
    <label for="content">내용</label>
    <textarea name="content" id="content" cols="30" rows="10">{{ article.content }}</textarea>
    <input type="submit" value='Update!'>
</form>

{% endblock %}
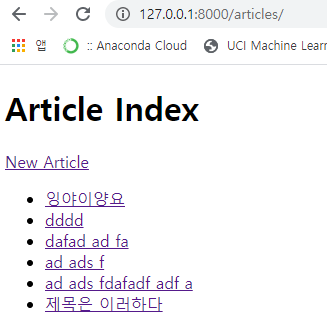
11-4. index.html
{% extends 'base.html' %}

{% block body %}

<h1>Article Index</h1>

<a href="{% url 'articles:new' %}">New Article</a>

<ul>
    {% for article in articles %}
        <li>
            <a href="{% url 'articles:detail' article.pk %}">{{ article.title }}</a>
        </li>
    {% endfor %}
</ul>

{% endblock %}
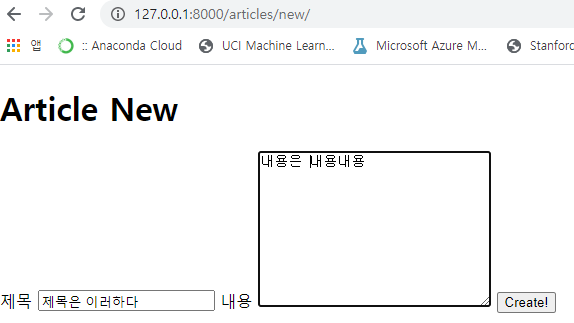
11-5. new.html
{% extends 'base.html' %}

{% block body %}

<h1>Article New</h1>

<form action="" method="POST">
    {% csrf_token %}
    <label for="title">제목</label>
    <input id="title" type="text" name="title">
    <label for="content">내용</label>
    <textarea name="content" id="content" cols="30" rows="10"></textarea>
    <input type="submit" value="Create!">
</form>

{% endblock %}
12. articles > urls.py
from django.urls import path
from . import views

app_name = 'articles'

urlpatterns = [
    # 1. GET / articles/
    path('', views.index, name ='index'), # 게시글 목록
    # 2. GET / articles / new /
    path('new/', views.new, name ='new'), # 게시글 작성 양식 (GET)
    # 3. POST / articles / new /
    # path('create/', views.create, name ='create'), # 게시글 생성! (POST)
    # 4. GET / articles / 1/
    path('<int:pk>/', views.detail, name= 'detail'),
    # 5. POST / articles /1/ delete/
    path('<int:pk>/delete/', views.delete, name='delete'),
    # 6. GET /articles /1/edit/
    path('<int:pk>/edit/', views.edit,name ='edit'), # 게시글 수정 양식 (GET)
    # 7. POST / articles/1/edit/
    # path('update/<int:pk>/', views.update, name = 'update'), # 게시글 수정! (POST)
]
13. articles > view.py
from django.shortcuts import render, redirect
from .models import Article

# Create your views here.
def index(request):
    # Database 조회
    articles = Article.objects.all() # 모든 데이터

    context = {
        'articles': articles,
    }
    return render(request, 'articles/index.html', context)

def new(request): # GET + POST
    if request.method == 'POST':
        title = request.POST.get('title')
        content = request.POST.get('content')

        # Database에 저장
        # 1. Article 인스턴스 생성
        article = Article(title=title, content=content)
        # 2. 저장!
        article.save()
        return redirect('articles:detail', article.pk)

    else :
        context = {

        }
        return render(request, 'articles/new.html', context)

def create(request): # POST
    title = request.POST.get('title')
    content = request.POST.get('content')

    # Database에 저장
    # 1. Article 인스턴스 생성
    article = Article(title=title, content=content)
    # 2. 저장!
    article.save()

    return redirect('articles:detail', article.pk)
    # context = {
    #     'title': title,
    #     'content': content,
    # }
    # return render(request, 'articles/create.html', context)

def detail(request, pk):
    # Database 조회: 단 하나의 data
    article = Article.objects.get(pk=pk)

    context = {
        'article': article,
    }
    return render(request, 'articles/detail.html', context)


def delete(request, pk): # POST
    # Database 삭제 (조회 + 삭제)
    # 1. 조회
    article = Article.objects.get(pk=pk)
    # 2. 삭제
    article.delete()

    return redirect('articles:index')


def edit(request, pk): # GET

    if request.method == 'POST':
        # 게시글 수정 수행
        title = request.POST.get('title')
        content = request.POST.get('content')

        # Database 조회 + 수정 + 저장
        # 1. 조회
        article = Article.objects.get(pk=pk)
        # 2. 수정
        article.title = title
        article.content = content
        # 3. 저장
        article.save()

        return redirect('articles:detail',article.pk)

    else :
        # 게시글 수정 양식 !


        # Database 조회( + 저장)
        # 1. 조회
        article = Article.objects.get(pk=pk)

        context = {
            'article': article,
        }
        return render(request, 'articles/edit.html', context)

def update(request, pk): # POST
    title = request.POST.get('title')
    content = request.POST.get('content')

    # Database 조회 + 수정 + 저장
    # 1. 조회
    article = Article.objects.get(pk=pk)
    # 2. 수정
    article.title = title
    article.content = content
    # 3. 저장
    article.save()

    return redirect('articles:detail',article.pk)
14. 웹에서 서버 확인 명령어 : Terminal 에서 입력
python manage.py startapp pages # 처음 시작할 때,
python manage.py runserver # 웹페이지 확인 
'노트 > Django : 웹' 카테고리의 다른 글
| [웹 프로그래밍 기초] 웹페이지 댓글 기능 구현하기 (0) | 2020.06.17 |
|---|---|
| [웹 프로그래밍 기초 ] django 관리자 계정 만들기 (0) | 2020.06.17 |
| [웹프로그래밍 기초] Django를 이용한 데이터베이스(DB) 구축하기 (0) | 2020.06.10 |
| [웹프로그래밍 기초] Django로 검색어 출력하는 페이지 만들기 (0) | 2020.06.09 |
| [웹프로그래밍 기초] Django 템플릿 언어 (0) | 2020.06.08 |